Check out my travel blog: Latitude Adjustment
Showing posts with label DIY. Show all posts

21 April 2012

DIY: From shirt to skirt!

Today I made a skirt using a t-shirt. After trying to look for an easy tutorial through Pinterest and being unsuccessful, I decided to tackle it on my own- because really- it can't be THAT hard... and it wasn't! It was really simple. All the tutorials I found made it way more complicated than I thought it should be. So this one is for those people who are beginners at sewing/crafting and are NOT a perfectionist (like ME!).


Here's how I did it:

  • First, I needed my supplies. I used a t-shirt (duh!), my sewing kit (needle & thread-- or a sewing machine, which I don't have...), scissors and a 500mm ruler (that I picked up from the store here for a buck!)

  • Next, I turned the shirt inside-out and placed my ruler across from armpit to armpit and cut. I now had two pieces. I saved the top piece (neckline/arms) for future projects.

  • I left the bottom hem alone. Then I pinned down the top hem, adjusting to the amount that I wanted. I didn't want it too short as I wanted to still be able to wear this skirt to work.

  • Then I sewed away! Sewing by hand is very time-consuming, so if you also plan on doing it by hand, plan on it taking a LONG time.


 I had to take-in the sides a bit. When you cut off the top part of the shirt, you're left with just a straight-cut piece of fabric- and my body is far from straight-cut!

The shirt I used was 95% Cotton and 5% Spandex, so it clings to the body quite a bit. But if you want more security and a better fit, I would suggest putting some elastic into the waistband. I can't find elastic, otherwise I would have put some-- I'm bummed that I can't find a craft store here! =(  I also chose this t-shirt because I would never wear it as a t-shirt, not my style. But for some reason when I saw it, the first thing I thought was "I would totally wear that as a skirt!" And in my opinion, it looks better that way.

Here's how it started- from t-shirt:

And the end result- a skirt:


I'm still in the learning stages of sewing and making things from other things-- crafting, upcycling, etc. etc. It's a fun process, but I can't wait until I am the crafting master! =) 

14 April 2012

DIY: Infinity Scarf from a t-shirt

Here is another- my 2nd!- Pinterest DIY project I've completed. The other day I was at this department store and they had a sale on shirts in which you pay by the kilo. I got 5 shirts for 15,000 won (which is about $15) because there are a few projects which involve shirts that I want to do.


I let my hubby chose which shirt to use for the scarf. He chose this one:


It was very simple and easy to do. You can find the easy-to-follow tutorial here:  // Between the lines //

Mine didn't come out as neat as her's, but I was working with crappy scissors and just thread and needle. . . plus, I like the rugged look anyways. =)
 
I like infinity scarves because you can also wear them as a hood for those chilly nights!

Follow me on Pinterest here.

01 April 2012

Pinterest Project- DIY: Holder for charging cell phone

My name is Leia, and I'm an addict.... a Pinterest addict!!

When I first heard about Pinterest, I didn't even want to go and see what it was all about because I didn't want to be addicted to another networking-type website.... until one day I gave in- and I've been hooked ever since! I literally spend hours on that dang thing!

This weekend, I completed my first Pinterest Project ! You see, I have a lot of projects I want to do that I've seen on Pinterest. I'm starting small- but hey, at least I finished something!

I made a holder for a charging cell phone- super easy to do!

I found this project and a step-by-step guide here. All you need is a lotion bottle (that's flat on the bottom & is big enough to hold your cell phone) and some gangster scissors (or box-cutter). In the original project, she uses fabric & modge podge to cover it, but I didn't have either of those supplies. I just used acrylic paint that I found in my apartment (that the person who lived here before us left) and it came out ok.

Here are some pictures (and again- click here for the original project & instructions!):


Start with an empty & dry plastic bottle

Carefully cut it to shape.
Decorate as desired.

And badaboom badabing! You got a little charging station that's cute AND saves some space!

08 February 2012

DIY Valentine's Day ideas

My husband doesn't believe in Valentine's Day, and I actually agree with his reasons-- the main reason being that it's just another holiday for people to consume more. So we've never done anything special on Valentine's day. (I'm not looking for pity, I'm just stating facts, because I'm ok with it). And Valentine's day is my father's birthday, so we're usually out celebrating his birthday anyways.

Even though we don't get each other things for Valentine's day, we usually like to make a little something. Buying and getting something for someone is different than making something for someone. There's no consuming involved- we use things we already have. One year my husband did make me a card (which stated all the facts about Valentine's day- the consumer facts- lol), and another year he made me a heart-shaped brownie. And I usually make something as well. And some years we don't make each other anything at all- which is fine.

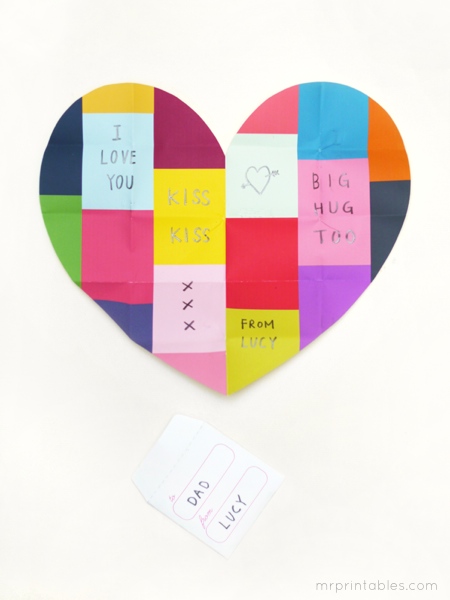
But this year I'm feeling a little creative and want to make something. So I was on the internet hunt for cute, but simple and easy, DIY Valentine's stuff and found some cute ideas (click on each of the pictures to go to the website to learn how to make them):


I don't know which one I'm going to choose yet. I have a few days to decide. =)